Frontend
Updating the frontend
To enable the frontend to listen to the IoT topic for ride time messages, you will need these two values:
- IoT endpoint hostname
- The Cognito Identity Pool ID.
In this section, you will retrieve these values and update the frontend configuration. After making the change, you will commit the change to the git repo, which will automatically republish the application using Amplify Console..
Step-by-step instructions
-
Go back to your browser tab with Cloud9 running. If you need to re-launch Cloud9, from the AWS Management Console, select Services then select Cloud9 under Developer Tools. Make sure your region is correct.
-
Run this command to show the IdentityPool Id:
aws cognito-identity list-identity-pools --max-results 10
- Run this command to show the IoT endpoint hostname:
aws iot describe-endpoint --endpoint-type iot:Data-ATS
- Run this command to show the AWS REGION:
echo $AWS_REGION
-
In the Cloud9 terminal, in the left directory panel navigate to
theme-park-frontend/src. -
Locate the config.js file and double-click to open in the editor.
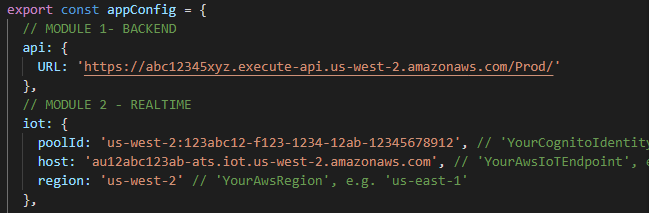
This file contains a JSON configuration for the frontend. The file is separated into modules that correspond with the modules in this workshop.
- In the MODULE 2 section at the beginning of the file, update the iot attributes as follows:
poolId: set to the IdentityPool Id from the section above.host: set to the IoT endpoint hostname from the section above.region: set to your AWS_REGION from the section above (e.g.'us-west-2').
- Save the file.
Push to CodeCommit and deploy via Amplify
- In the Cloud9 terminal, change to the front-end directory with the following command:
cd ~/environment/theme-park-frontend/
- Commit to CodeCommit by executing the following commands:
git commit -am "Module 2"
git push
- After the commit is completed, go to the Amplify Console. Make sure you are in the correct region.
- In the All apps section, click theme-park-frontend.
You will see a new build has automatically started as a result of the new commit in the underlying code repo. This build will take a few minutes. Once complete:
- Open the published application URL in a browser.
You can now see the rides and attractions on the theme park map show realtime wait times that update every minute.